Table of Contents
Introduction
Hello, it’s been a while. Thought it’d be time for a new blog article (one that actually is finished). And this time I wanted to do it about machine learning and LLM’s; two hot topics in our current developer world, aren’t they.
With so much information out there, it can be hard to start learning about the topic. Should you start with the absolute basics and look into how machine learning (to be called ML) models are build? Take a peek at individual layers and see what they do? My belief in this is that for someone who doesn’t have to build Large Language Models (to be called LLM’s) or ML models, it’s better to find out how you can implement them for your own use cases, rather than to know the full working behind it.
My use case was simple: I’m a .NET guy and don’t like when I have to use external online services to get things done. Let’s take a look at a completely local .NET solution to retrieve- and consult the contents of our own documents without leaving our own network.
The Problem
There aren’t many people interested nowadays in pushing for own local solutions when it comes to LLM’s and Retrieval-Augmented Generation (to be called RAG), the reasons for it are varied. Online models, like ChatGPT and Gemini, are overall more up-to-date, are backed by huge companies pumping in a lot of time and manpower to get these amazing LLM’s out there; time and manpower that some companies just don’t have. These models are sometimes free, but with a caveat: the data you give to the model will be used for future training purposes. Better said: it isn’t your data anymore. Unless you’re willing to put down some money, the data that you give to these companies can be saved and used for future training, meaning your company’s data could be at risk.
Therefore a local solution would be nice to have. That way you can have control over your data while you’re using new “cutting edge” technologies, albeit not with the latest models. In this article I’ll present a way to use SemanticKernel in combination with ONNX models to consult an LLM about your local data, which is embedded and saved into a PostgreSQL database with the pgvector plugin for easy access, all within your own network or on your own device. Strap in, this’ll be a long read.
The Plan
The setup and execution of the project will be really simple: a .NET 8 Console application with a few packages that will enable us to run the whole thing and setup a Docker container for pgvector. I’ll describe the process of building the application with steps.
1. Setup
First setup a new .NET 8.0 Console application. We’re going to need to install a few packages, and as of writing this article, also some packages that are marked as prerelease.
The following Microsoft.SemanticKernel.* packages:
- *.Core;
- *.Connectors.Onnx;
- *.Connectors.Postgres;
- *.PromptTemplates.HandleBars;
And optionally if you want to read out *.pdf files:
- PdfPig
We’re also going to need an ONNX LLM that we’ll be inferring on + a model that’s used to embed our text into vectors. For the LLM model I used the microsoft/Phi-3-mini-4k-instruct-onnx, which is an optimized and quantified version of Microsoft’s Phi-3 model, but you can pick any ONNX model, as all are compatible with the generic SemanticKernel connectors. For sentence transforming I went with TaylorAI/bge-micro-v2. For the sentence transformer model (to be called BERT model), it’s not really important which one you pick either, as long as you’re consistent. If you’ve used one embedding model and embed text into your database, you can’t switch again, as other models have different outputs, which can mess with the accuracy at which your results are returned from the database (don’t worry, this will make sense later).
Download both models and put them into your project. Below is the folder structure I used, which is purely for testing purposes. A better way of setting this up would be to not copy the LLM and embedding model with the project, but it makes it easier to ship the whole thing in one go while I’m in the development phase.
LocalRAGSemanticKernel/├── Input/│ └── Real-Time Hatching.pdf├── LLM/│ ├── ONNX/│ │ ├── config.json│ │ ├── genai_config.json│ │ ├── phi3-mini-4k-instruct-cpu-int4-rtn-block-32.onnx│ │ ├── phi3-mini-4k-instruct-cpu-int4-rtn-block-32.onnx.data│ │ ├── tokenizer.json│ │ ├── tokenizer.model│ │ └── tokenizer_config.json│ └── TextEmbedding/│ ├── vocab.txt│ └── model.onnx└── Program.csAs you can see in figure 2, I’ve split the ONNX model and embedding model into separate directories to make them easier to be loaded into the Kernel. If you want to copy these directories with every build, you can use the snippet below in figure 3 in the *.csproj file of your project.
<!--Rest of the file omitted for clarity's sake-->
<ItemGroup> <Content Include="Input/**"> <CopyToOutputDirectory>PreserveNewest</CopyToOutputDirectory> </Content> <Content Include="LLM/**"> <CopyToOutputDirectory>PreserveNewest</CopyToOutputDirectory> </Content> </ItemGroup>2. Loading our Kernel
Navigate to Program.cs. This will be the entry point to our LLM application. To make things easier to and asynchronous, I’ve setup a MainAsync() method that gets awaited within the Main() function. In this MainAsync method we’ll setup our Kernel. This Kernel is the “core” of the SemanticKernel’s way of working. It’ll contain the state of our workload and is used to add different connectors, services and other middlewares to our LLM workflow.
By setting up a IKernelBuilder we can add services that we need to use in order for the ONNX model- and BERT model to be loaded in. This can be done by using extension methods that the Connectors.Onnx provides for us, called .AddOnnxRuntimeGenAIChatCompletion(). In figure 4 you can see the basic setup of the Kernel.
using Microsoft.SemanticKernel;using Microsoft.SemanticKernel.Text;
namespace LocalRAGSemanticKernel{ internal class Program { static void Main(string[] args) { MainAsync().Wait(); }
private static async Task MainAsync() { // Prepare Kernel builder IKernelBuilder kernelBuilder = Kernel.CreateBuilder() .AddOnnxRuntimeGenAIChatCompletion("phi-3", @"LLM/ONNX");
// Build Kernel Kernel kernel = kernelBuilder.Build(); } }}With the Program.cs in this state, we could already ask our LLM questions. All we’d have to do is call the kernel.InvokePromptStreamingAsync method, give it a template, pass in some Console input as KernelArguments and we’d be on our way to ask it questions. Let’s get that small piece of code setup as well (check figure 5).
/* Rest of the code omitted for clarity sake */
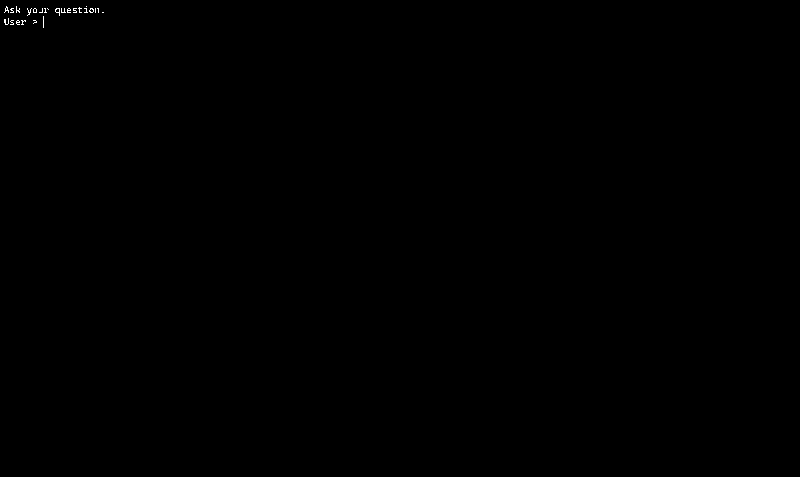
// Act Console.WriteLine("Ask your question.\nUser >"); string question = Console.ReadLine();
IAsyncEnumerable<StreamingKernelContent> response = kernel.InvokePromptStreamingAsync( promptTemplate: "Answer the following question: {{question}}", arguments: new KernelArguments() { { "question", question } } );
Console.Write("\nAssistant > ");
await foreach(string message in response) Console.Write(message);
} // End of MainAsync method } // End of Program class} // End of namespaceWhich will result in this little interaction if you talk to it. With only a few lines of code we got the basic part of our setup already done. Good job! As you can see in figure 6, you can now talk to the LLM. All that’s left to do is give it some extra context in the form of our PDF documents and we’re well on our way.
3. RAG and vectors
So how are we going to get RAG into this? First let’s break down how RAG can be applied to LLM’s. LLM’s work by predicting what kind of output to give after each previous output. It does this by categorizing words, spelling related categories like prefixes and suffixes or entire common phrases into a long list of tokens. The process of training then takes this list of tokens and feeds it a ton and ton of (perhaps unethically) farmed sentences, paragraphs and such to let it predict what has the most odds of coming after another (set of) token(s). Do this enough times and the model will keep becoming better at predicting what should come after a token.
A token is a numerical association with a set of characters. If you open the tokenizer.json in the ONNX directory you can find the list of tokens used for the model you’ve picked. In figure 7 you can find a snippet of what’s contained in Microsoft’s Phi-3.
... "used": 3880, "range": 3881, "▁tamb": 3882, "▁module": 3883, "▁directory": 3884, "ounds": 3885, "Activity": 3886, "▁mu": 3887, "info": 3888, "▁free": 3889, ...Our RAG workflow will look pretty simple, but contains all the necessary parts to scale up. The idea is that the files we want to index will read out as large strings. That text will then be split again using a chunking strategy (which strategy that’d be and the positive and negatives of them I’ll explain later). Those chunks will then be turned into an array of tokens, which we’ll then give a new name: vectors. In our database, this case it’s a PostgreSQL database, we’ll make a table containing in which the relation between the text and the vectors is made. If we then query with the input of the users also embedded into a vector on the vectors of the text that we chunked and see which row is related to our query, we can then fetch the original text which the vector is made up from. Et voila, we get our relevant data.
The bge-micro-v2 sentence transformer will always output a densely packed vector space with 384 dimensions, which in plain terms mean it’ll output an array with a length of 384 which contains floating points with which the input is transformed. But why would we need all that? Well computers can’t think the way we as people can (sorry robots, no offense) and especially to something as complex as human communication, computers can’t hold a candle. The speed, “broadness” and accuracy at which we can find associations with words and construct sentences without breaking a sweat is truly something amazing. The moment I start talking about an “apple” we can think of so many associations with that word, from “doctor”, “lunch” to personal memories associated with it.
To simulate this behavior, very smart people have made BERT models to transform sentences into a densely packed vector space to map out these associations. So for example, if the word “apple” gives the result 0,500001 from a BERT model, then tightly associated words that it’s trained on will be closer to that value. Perhaps “fruit” lives under 0,500004, while “submarine” is much further apart from both “fruit” and “apple”. This way a text input can quickly be associated with a set of numbers, and associations with that input can quickly be located, as saved vectors that are close to the vectors from the input can be seen as associated pieces of text.
[ -0,35806346, -0,07366015, 0,401713, -0,16480955, 0,33958533, 0,08617111, 0,7219443, ... ]4. Preparing results
So in order for us to make these relations between vectors and text, we need some form of database. For this project, I’ve picked a combination of PostgreSQL and pgvector. The inner workings of these systems I’ll leave up to you to read about, for now just take my word for it that they’ll work for our use case. For my setup, I used a docker container to get a combination of PostgreSQL and pgvector (to be called database) up and running, leaving everything at default. You can add special cases or parameters if you want to, but the most important things are is that you can connect with it using your .NET application, so setting a username, password and port to run on are mandatory.
When you’ve got the database running it’s time to setup the connection between it and our Kernel. We’ll start of by setting up a model with the right properties to create relations between our data and the embedding of that data. Below in figure 9 you can see the model that I’ve made to do just that.
public class DocumentItem{ [VectorStoreRecordKey(StoragePropertyName = "id")] public string Id { get; set; } = string.Empty;
[VectorStoreRecordData(StoragePropertyName = "name")] [TextSearchResultName] public string Name { get; set; } = string.Empty;
[VectorStoreRecordData(StoragePropertyName = "text")] [TextSearchResultValue] public string Text { get; set; } = string.Empty;
[VectorStoreRecordData(StoragePropertyName = "reference_link")] [TextSearchResultLink] public string ReferenceLink { get; set; } = string.Empty;
[VectorStoreRecordVector(384, StoragePropertyName = "embedding")] public ReadOnlyMemory<float> Embedding { get; set; }
public DocumentItem() { }
public DocumentItem( string id, string name, string text, string referenceLink, ReadOnlyMemory<float> embedding) { Id = id; Name = name; Text = text; ReferenceLink = referenceLink; Embedding = embedding; }}As you can see, it uses a combination of attributes, one which notates the way it should be stored in the database (the VectorStoreRecord{x} attributes), and ones that indicates how the result should be used (the TextSearchResult{x} attributes). At the point that we’re going to build our prompt template the Name, Value and Link part of the TextSearch attributes will make more sense, as they’ll match the terms used in the prompt template. Important to note though, is that the dimensions of the VectorStoreRecordVector should be equal to the length of the output of your BERT model. In my case, as I’m using bge-micro-v2 it’s 384.
To allow our Kernel to connect to the database, we need to tell it to use the TextSearch plugin, which in term uses the NpsqlDataSource to get it’s data.
/* Rest of Program.cs omitted for clarity */
// Vector Store NpgsqlDataSourceBuilder dataSourceBuilder = new("Host=localhost;Port=5432;Database=postgres;Username=postgres;Password=postgresPwd;"); dataSourceBuilder.UseVector();
NpgsqlDataSource dataSource = dataSourceBuilder.Build();
// Create Vector collection PostgresVectorStore vectorStore = new(dataSource); IVectorStoreRecordCollection<string, DocumentItem> collection = vectorStore.GetCollection<string, DocumentItem>("documents"); await collection.CreateCollectionIfNotExistsAsync();
// Create VectorStore TextSearch VectorStoreTextSearch<DocumentItem> textSearch = new(collection, textEmbedding); KernelPlugin textSearchPlugin = textSearch.CreateWithGetTextSearchResults("SearchPlugin");
kernel.Plugins.Add(textSearchPlugin);
/* Rest of Program.cs omitted for clarity */TextSearch plugin.Running what’s in figure 10 won’t give you many results, as we’re still missing the table inside the database. On line 41-41 you can see that we create a VectorStore with a string key and a DocumentItem value, which is equivalent to a table in our database.
Now it’s time to get data into the database. For this there are several strategies that you can choose which will influence the result you get, but should be tailored towards the data you have. Since you can split the source data different ways and lengths, seeing what fits for you and your data is the best way to go. What’s meant with “splitting the text” is that in order to give enough context to the LLM, the right snippets of data should be taken to give the best tailored answer for your inquiry. There are different strategies for this, based on sentences, combination of words, sections or paragraphs. For this setup I’ve chosen paragraphs, because it’s easy to implement. With SemanticKernel’s TextChunker class, you can choose different strategies however, and also take into account if you want to include any overlapping tokens between these chunks.
/* Rest of Program.cs omitted for clarity */
// Prepare Kernel builder IKernelBuilder kernelBuilder = Kernel.CreateBuilder() .AddOnnxRuntimeGenAIChatCompletion("phi-3", @"LLM/ONNX") .AddBertOnnxTextEmbeddingGeneration(@"LLM/TextEmbedding/model.onnx", @"LLM/TextEmbedding/vocab.txt");
// Builder Kernel Kernel kernel = kernelBuilder.Build();
// Tokenizer Embedding ITextEmbeddingGenerationService textEmbedding = kernel.GetRequiredService<ITextEmbeddingGenerationService>();
/* Vector database preparation omitted for clarity */
// Add text to Vector DB string[] files = Directory.GetFiles("Input", "*.pdf"); foreach (string file in files) { using PdfDocument document = PdfDocument.Open(file); string[] lines = new string[document.NumberOfPages];
for (int i = 0; i < lines.Length; i++) // Using nearest neighbour word extractor since the text is hard to extract on the default variant lines[i] = string.Join(" ", document.GetPage(i + 1).GetWords(NearestNeighbourWordExtractor.Instance));
IEnumerable<string> paragraphs = TextChunker.SplitPlainTextParagraphs(lines, 384, overlapTokens: 5); foreach (string paragraph in paragraphs) { ReadOnlyMemory<float> embed = await textEmbedding.GenerateEmbeddingAsync(paragraph);
DocumentItem item = new( Guid.NewGuid().ToString(), Path.GetFileName(file), paragraph, Path.GetFullPath(file), embed);
await collection.UpsertAsync(item); } }In figure 11 you can see a simple setup that takes a PDF document, splits it’s contents up into lines per page, then proceeds to chunk those lines using the TextChunker class into paragraphs with an overlap of 5 and a maximum of 384 tokens, which means that from each paragraph there’ll be 5 tokens from the next paragraph and the previous.
Want to check the results from VectorStoreSearch?
That’s pretty simple to achieve. All you have to do is follow the below example and it’ll show which results are taken from the vector database. You can also check the official Microsoft documentation about the VectorStoreSearch.
string query = Console.ReadLine();
KernelSearchResults<TextSearchResult> contents = await textSearch.GetTextSearchResultsAsync(query, new() { Top = 1 });
Console.WriteLine($"Found a total of {contents.TotalCount} records.");
await foreach (TextSearchResult result in contents.Results) { Console.WriteLine($"Name: {result.Name}"); Console.WriteLine($"Value: {result.Value}"); Console.WriteLine($"Link: {result.Link}"); }In my case, this results in the following result.
User > How do you render with TAM?
Found a total of 1 record.
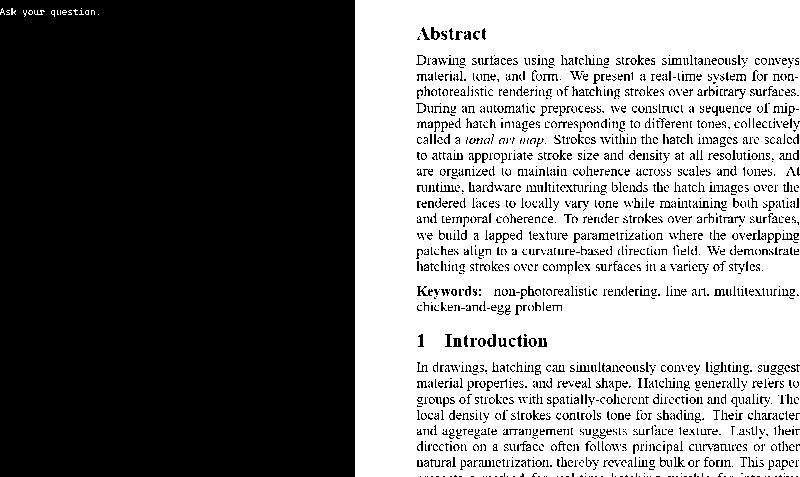
Name: Real-Time Hatching.pdfValue: 7 Results and Discussion Figure 5 shows six models rendered by our system, each using using a different style TAM (shown inset). As shown to the right, by simply changing the tone values in the columns of the TAM and adjusting a tone transfer function, the renderer can also be used to produce black-and-white crayon on gray paper (above), or to simulate a white- on-black "scratchboard" style (below). The original models range from 7,500 to 15,000 faces, while overlapping patches due to lapped textures increase the range by roughly 50%. Our prototype renders these models at 20 to 40 frames per second on a 933MHz Pentium III with OpenGL/GeForce2 graphics. To use the eficient rendering scheme described in Section 5 we have restricted our TAMS to grayscale; however, the emergence of new graphics cards with more multitexture stages will enable rendering of color TAMs with comparable frame rates. The directionLink: C:\LocalRAGSemanticKernel\LocalRAGSemanticKernel\bin\Debug\net8.0\Input\Real-Time Hatching.pdfAnd that’s it! We’ve now achieved all we need to to prepare for RAG. We’ve setup our Kernel with both a BERT ONNX model and a separate ONNX LLM model, setup a PostgreSQL database with the vector extension and loaded in our data. All that’s left to do now is to get our results back and put them into our prompt.
5. Getting results
For that we have to use HandleBars, which helps us format our text and act on expressions that are embedded into the text. This will allow us to easily inject the results from our vector database into the prompt that’s going to be send to the LLM. Below in figure 12 you can find the template that I’ve used for this project.
Please use this information to answer the question:{{#with (SearchPlugin-GetTextSearchResults question)}} {{#each this}} Name: {{Name}} Value: {{Value}} Link: {{Link}} ----------------- {{/each}}{{/with}}
Include citations to the relevant information where it is referenced in the response.
Question: {{question}}On line 2 of figure 12 you can see that we use the SearchPlugin-GetTextSearchResults to get a list of results from the vector database; it calls the GetTextSearchResults method which is on the SearchPlugin plugin that we’ve added in the Kernel. Using the HandleBars it’ll loop over the results from the plugin, then proceeds to inject the values into the prompt and we ask the LLM to use these as a citation, then proceed to inject the question itself.
If we add this into our code, then the entire Program.cs looks like this.
/* Imports omitted */
namespace LocalRAGSemanticKernel{ internal class Program { static void Main(string[] args) { MainAsync().Wait(); }
private static async Task MainAsync() { // Prepare Kernel builder IKernelBuilder kernelBuilder = Kernel.CreateBuilder() .AddOnnxRuntimeGenAIChatCompletion("phi-3", @"LLM/ONNX") .AddBertOnnxTextEmbeddingGeneration(@"LLM/TextEmbedding/model.onnx", @"LLM/TextEmbedding/vocab.txt");
// Build Kernel Kernel kernel = kernelBuilder.Build();
// Tokenizer Embedding ITextEmbeddingGenerationService textEmbedding = kernel.GetRequiredService<ITextEmbeddingGenerationService>();
// Vector Store NpgsqlDataSourceBuilder dataSourceBuilder = new("Host=localhost;Port=5432;Database=postgres;Username=postgres;Password=postgresPwd;"); dataSourceBuilder.UseVector();
NpgsqlDataSource dataSource = dataSourceBuilder.Build();
// Create Vector collection PostgresVectorStore vectorStore = new(dataSource); IVectorStoreRecordCollection<string, DocumentItem> collection = vectorStore.GetCollection<string, DocumentItem>("documents"); await collection.CreateCollectionIfNotExistsAsync();
// Create VectorStore TextSearch VectorStoreTextSearch<DocumentItem> textSearch = new(collection, textEmbedding); KernelPlugin textSearchPlugin = textSearch.CreateWithGetTextSearchResults("SearchPlugin");
kernel.Plugins.Add(textSearchPlugin);
// Add text to Vector DB string[] files = Directory.GetFiles("Input", "*.pdf"); foreach (string file in files) { using PdfDocument document = PdfDocument.Open(file); string[] lines = new string[document.NumberOfPages];
for (int i = 0; i < lines.Length; i++) // Using nearest neighbour word extractor since the text is hard to extract on the default variant lines[i] = string.Join(" ", document.GetPage(i + 1).GetWords(NearestNeighbourWordExtractor.Instance));
IEnumerable<string> paragraphs = TextChunker.SplitPlainTextParagraphs(lines, 384, overlapTokens: 5);
foreach (string paragraph in paragraphs) { ReadOnlyMemory<float> embed = await textEmbedding.GenerateEmbeddingAsync(paragraph); DocumentItem item = new( Guid.NewGuid().ToString(), Path.GetFileName(file), paragraph, Path.GetFullPath(file), embed);
await collection.UpsertAsync(item); } }
// Act Console.WriteLine("Ask your question.\n"); string question = Console.ReadLine();
IAsyncEnumerable<StreamingKernelContent> response = kernel.InvokePromptStreamingAsync( promptTemplate: """ Please use this information to answer the question: {{#with (SearchPlugin-GetTextSearchResults question)}} {{#each this}} Name: {{Name}} Value: {{Value}} Link: {{Link}} ----------------- {{/each}} {{/with}}
Include citations to the relevant information where it is referenced in the response.
Question: {{question}} """, arguments: new() { { "question", question } }, templateFormat: "handlebars", promptTemplateFactory: new HandlebarsPromptTemplateFactory());
Console.Write("\nAssistant > ");
await foreach (StreamingKernelContent message in response) Console.Write(message);
Console.WriteLine(); } }}Highlighted is the part that makes the RAG tick and enables the LLM to respond to the inquiry that the user has inputted. If you’ve followed along, then now your local RAG application should work just fine. Again, this is a really simple setup and leaves a lot to be desired, but it showcases how easy it is to get started on such a project. Try not to shy away from adding complexity to this, as you can improve a lot on what’s here, and even extend it by using more advanced plugins or even text plugins. I’ll leave that up to you!
Conclusion
It’s certainly possible to create your own RAG application with SemanticKernel while having everything run locally. As the documentation for SemanticKernel is a bit lacking as of this moment, especially when it comes to a full application showcasing RAG from start to finish, I think this article should help people get a basic grip on how to begin. From here on there’s a lot more documentation that can help you get improve what’s been set up.
I hope you enjoyed reading my article, and please don’t shy away from sending me questions or to leave feedback or remarks on what I’ve written. I’m always open to feedback.
Once I have time, I’ll make the project proper and upload it to GitHub. Expect changes to this article in the future.